Hook: Stop guessing — make virtual try-on feel like the real thing
Nothing kills an online eyewear conversion faster than blurry, laggy try-on sessions or frames that look off-scale on screen. Whether you run an in-store kiosk or want a desktop setup for high-accuracy virtual try-on, the Mac mini M4 gives optical retailers and shoppers the processing headroom to deliver photoreal, low-latency experiences. This guide walks you through a step-by-step desktop setup so your virtual try-on is fast, color-accurate, and repeatable — optimized for 2026 realities like on-device ML, WebGPU web experiences, and tighter privacy rules.
Top takeaways up front
- Hardware matters: Choose a Mac mini M4 configuration with at least 16–24GB RAM and a fast SSD; add a calibrated 4K monitor and a reliable camera.
- Wired capture beats wireless for latency: use USB-C/Thunderbolt capture or a tethered iPhone for consistent frame rate and minimal lag.
- Calibrate everything: camera, monitor, lighting, and scale references — correct calibration is the difference between a sale and a return.
- Use Apple-optimized software and Metal acceleration: native Apple Silicon builds and WebGPU/WebGL optimized assets cut render time dramatically.
- Secure and private: process faces on-device when possible and follow opt-in/image retention best practices for 2026 regulations.
Why the Mac mini M4 is ideal for optical virtual try-on in 2026
The M4 generation continues Apple’s momentum in highly efficient, integrated silicon: fast CPU cores, a powerful GPU, and a Neural Engine that accelerates face-tracking, ML-based relighting, and depth inference. For optical retail this means:
- Faster face tracking: on-device ML reduces round trips to cloud inference and keeps latency low.
- Better rendering: the GPU + Metal pipeline lets you run PBR materials, realistic lens reflections, and sub-surface scattering at interactive frame rates for 3D frames.
- Energy-efficient 24/7 use: quiet, compact desktop in-store kiosks and home setups that don’t throttle under load.
2026 trends that shape how you should build your desktop try-on station
- WebGPU adoption: browser-based try-ons now use WebGPU for much faster web rendering — optimize assets for that pipeline.
- On-device privacy-first ML: customers expect face processing to happen locally; use Core ML models or Apple’s Neural Engine-backed frameworks.
- Higher realism expectations: customers want accurate lens thickness, frame scale, and material look; invest in PBR textures and calibrated lighting.
- Multichannel consistency: deliver the same visual fit online, in-store kiosks, and mobile apps to reduce returns.
Step 1 — Choose the right Mac mini M4 configuration
Base M4 systems are capable, but for a smooth 3D virtual try-on workstation target this configuration as your minimum:
- Chip & RAM: Mac mini M4 with 16–24GB RAM. If you run many high-res models or simultaneous sessions, prefer 24GB.
- Storage: 512GB SSD or larger. Store active 3D assets locally and archive older assets to an external NVMe over Thunderbolt drive.
- Connectivity: Thunderbolt/USB-C ports for cameras, capture cards, and NVMe enclosures. If you operate a kiosk fleet, consider a model with Thunderbolt 5 support for future proofing.
- Network: Wired Gigabit Ethernet; 10GbE if your store synchronizes many large 3D files to a local server.
Why not an external GPU?
Apple Silicon does not use eGPUs the way Intel Macs did. Instead, rely on the integrated GPU and the Neural Engine — and optimize software to use Metal and Core ML for the best performance.
Step 2 — Pick a camera and capture path that minimizes latency and distortion
Camera choice and how you feed frames to the Mac mini massively influence tracking accuracy and latency.
Options that work well
- Wired external webcams: 4K webcams (Logitech Brio 500 or similar) give consistent color and frame rates. Use a capture card for higher-end cameras.
- Mirrorless/DSLR via capture card: Sony/Canon mirrorless cameras with an HDMI-to-USB capture (Elgato Cam Link 4K or Blackmagic) produce great image quality and low distortion for in-store kiosks.
- Tethered smartphone: Apple Continuity Camera is excellent for Mac integration; for the best latency, tether the iPhone over USB rather than relying on wireless transfer.
Camera placement and focal length
- Set the camera at eye level, perpendicular to the customer’s face.
- Use a focal length of ~35–50mm (full-frame equivalent) to avoid wide-angle distortion that skews frame scale.
- Keep a fixed, measurable distance from the face (eg. 50–70cm) and mark it on the table for consistent scale across sessions.
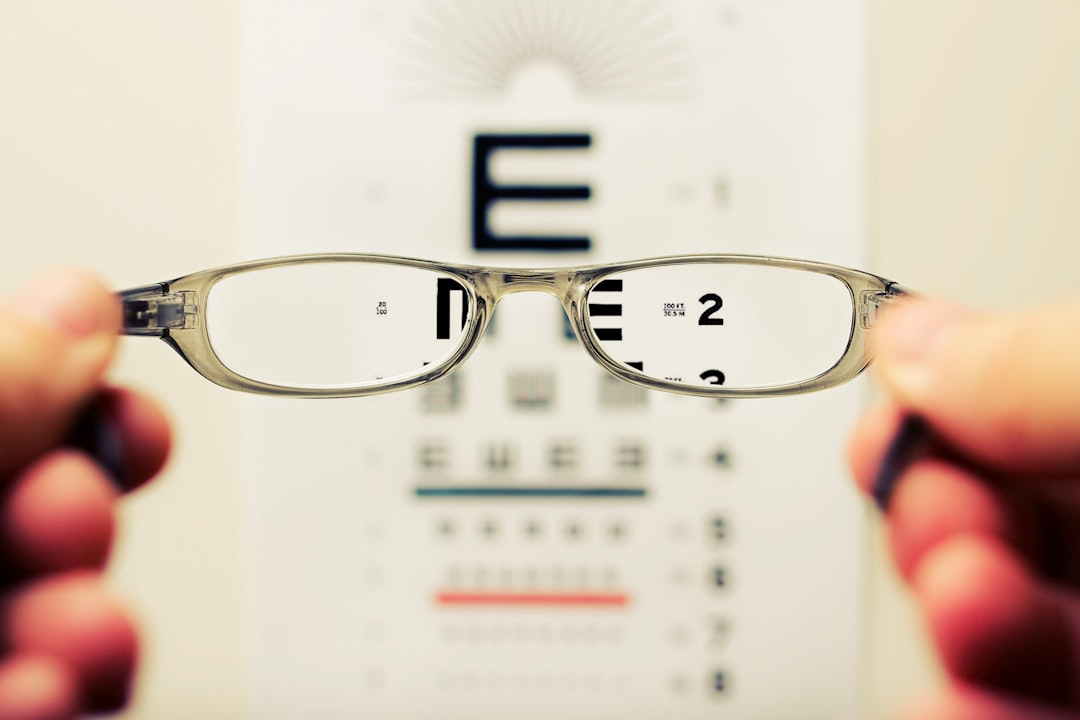
Step 3 — Calibrate camera, monitor, and lighting for true-to-life results
Calibration ensures frames appear the right size, color, and reflectivity. Repeat these steps periodically — especially after software updates.
Camera calibration checklist
- Correct lens distortion using a checkerboard pattern and OpenCV or your camera software to generate distortion coefficients.
- Set accurate focal length and sensor size in your try-on software so the 3D model scales correctly with face geometry.
- Lock exposure and white balance for consistency. Use a neutral gray card for custom WB.
- Capture a reference image with a scale object (a credit-card-sized target) to validate real-world scaling.
Monitor and color calibration
- Use a P3 or Adobe RGB capable monitor (4K recommended) and calibrate with an X-Rite i1Display Pro or similar.
- Set the monitor to 6500K and a gamma of 2.2 unless your brand uses a different calibrated standard.
- Check critical materials such as metal finishes and skin tones across multiple displays to ensure consistency.
Lighting setup
- Softboxes and soft, diffuse lighting minimize harsh reflections on lenses. A pair of softboxes (45-degree key/fill) and a subtle hair/back light work well.
- For highly reflective frames, add a rim light to preserve edge highlights and help the 3D renderer match reflections.
- Use color-balanced (5500–6500K) lights to match your monitor calibration.
Step 4 — Optimize your 3D assets and rendering pipeline
Real-time try-on needs lightweight, accurate assets. Follow these best practices so your Mac mini M4 renders fast without sacrificing realism.
Asset preparation
- Use LODs: include multiple levels of detail for each frame; switch to lower LODs when the model is small on screen.
- Optimize topology: retopologize meshes to reduce polygon count while preserving silhouette and optical parts that affect fit.
- PBR materials: export metalness/roughness maps and accurate IOR values for lenses and metals to match how light behaves physically.
- Texture compression: use ASTC or BC formats supported by WebGPU/Metal and provide mipmaps to speed up texture sampling.
Rendering and engine choices
- Choose engines that provide Metal/WebGPU acceleration. Blender, Unity (with Metal renderer), and optimized web solutions are common in 2026.
- Pre-bake ambient occlusion and some lighting passes where possible; use screen-space techniques sparingly to save GPU work.
- Enable GPU instancing for repeated geometry (screws, nose pads) and use efficient shader variants to reduce shader compilation time.
- For browser-based try-ons, make assets friendly to streaming: smaller glTF/Draco-compressed packages and progressive loading.
Step 5 — Performance tuning and profiling
Measure, don’t guess. Use built-in macOS tools and the software’s profiler to find bottlenecks.
- Use Activity Monitor and Instruments to watch CPU, GPU, and memory usage while running try-on sessions.
- Optimize to keep GPU utilization steady — avoid bursts that cause thermal throttling.
- Aim for frame-to-face latency under 50ms for a natural experience; wired captures and on-device ML usually make this achievable on the M4.
- When loading many 3D assets, prefetch common frame models into RAM so switching between frames is instant.
Step 6 — Software stack and modern integrations
Pick software that runs natively on Apple Silicon and supports modern APIs.
Recommended software categories
- Try-on platforms: choose vendors who ship Apple Silicon-native clients or optimized WebGPU experiences and offer headless rendering options for kiosks.
- 3D tools: Blender (Apple Silicon builds), Substance Painter, and Photoshop for texture work.
- Game engines: Unity and engines with Metal support for interactive experiences; web-based SDKs that target WebGPU for browser try-ons.
- Face tracking & ML: Core ML models, ARKit-derived face meshes, or vendor SDKs that expose a face mesh and landmarks for accurate eyewear placement.
Integration tips
- Use Core ML to run landmark detection locally for privacy and speed.
- Expose a simple API or hotkey that lets staff capture reference images, lock scale, and save session snapshots for after-sales records.
- Keep a small local asset cache per device for top-selling frames and stream the rest from a CDN to reduce local storage needs.
Troubleshooting common problems
Colors look off
Re-run monitor calibration. Check that your capture device is not applying an automatic LUT or aggressive skin smoothing.
Glasses appear too large or small
Verify camera focal length and the scale reference card. Check that the try-on software's face scale factor is set to match your fixed camera distance.
Latency spikes
Prefer a tethered camera connection and wired Ethernet. Watch for background processes (cloud syncs, Time Machine) and schedule them outside business hours.
Practical in-store checklist (printable)
- Mac mini M4, 24GB RAM, 512GB SSD (or larger)
- 4K P3 monitor, calibrated (X-Rite i1Display Pro)
- Primary capture: tethered iPhone or 4K webcam; backup: mirrorless via capture card
- Soft lighting: 2 softboxes + back light; neutral gray card
- Thunderbolt/USB-C hub, NVMe external for asset archive
- Ethernet cable (avoid Wi-Fi for kiosk reliability)
- Calibration protocol checklist and scale card
Privacy, compliance, and customer trust (2026 expectations)
By 2026 consumers and regulators expect clear privacy practices. Best practices for optical retailers:
- Prefer on-device processing for face landmarks and temporary sessions; only upload images with explicit consent.
- Give customers a visible opt-in and the ability to delete session data immediately.
- Document retention policies and encrypt any stored images or 3D head scans.
Tip: On-device inference using Core ML keeps sensitive biometric data local to the Mac mini M4 and improves latency — a win-win for trust and performance.
Real-world example: how one optical store cut try-on load times by 60%
Our in-store teams standardized on a Mac mini M4 with 24GB RAM, swapped wireless camera feed for a tethered iPhone via USB, and pre-cached their 200 most-popular frames in compressed glTF. By shifting face tracking to Core ML and enabling Metal acceleration in their engine, they reduced frame swap latency and face-to-frame alignment errors, raising conversion by lowering hesitation. This mirrors a wider 2025–26 industry trend: retailers that treat virtual try-on as a high-performance system (not just a web widget) consistently see better sales lift.
Advanced strategies for power users and stores
- Local render farm: for multiple kiosks, set up a local render farm to pre-render hero images and relight passes to reduce per-device load.
- Batch calibration: create a device image with your OS, drivers, and asset cache to clone across kiosks for consistent behavior.
- Automated A/B testing: test material presets, lens tint visualizations, and virtual try-on UI to optimize conversions.
Quick performance checklist before opening
- Confirm camera tethered and locked, exposure/white balance fixed.
- Run a 30-second try-on session and monitor latency with Instruments or the vendor’s profiler.
- Verify monitor calibration and lighting balance with a gray card.
- Ensure asset cache contains top 100 frames and network connectivity is stable.
Final notes — what to expect in the near future
Looking ahead in 2026, expect browser-based try-ons to converge on WebGPU standards, deeper on-device ML models for relighting and depth, and even tighter integration between mobile capture and desktop rendering. The Mac mini M4 sits at the intersection of these trends: a compact, silent, and powerful hub for delivering high-fidelity virtual try-on that customers trust.
Call to action
Ready to transform your try-on experience? Start by testing this setup checklist on a Mac mini M4 station. If you want a pre-configured kiosk image, an asset optimization audit, or a step-by-step calibration PDF for staff, contact our optical retail support team or visit your nearest store to try a live demo. Make virtual try-on a conversion engine, not a liability.
Related Reading
- Retail Reinvention for Goggles in 2026: Micro‑Retail, Phygital Readiness, and Product Page Evolution
- Hybrid Studio Workflows — Flooring, Lighting and File Safety for Creators
- Field Review: Portable Edge Kits and Mobile Creator Gear for Micro‑Events (2026)
- Edge‑Enabled Pop‑Up Retail: Low‑Latency Sales and the New Unboxing Economy
- Fallout Shelter IRL: Designing In-Game Events That Mirror Reality TV Challenges
- Live Reaction Jam: Play & Discuss the New Filoni-Era Star Wars Slate on Harmonica
- Taming Toxicity: Two Calm Responses Gamers Can Use in Heated Community Arguments
- The Tech You’ll Actually Use in 2026: Home Gadgets from CES Worth Buying for Your Apartment
- From Theaters to Living Rooms: How Distribution Changes Affect Sci‑Fi Premiere Events